Showing posts with label track. Show all posts

Sunday, 29 April 2018

Spring clean required

Shocked to discover the state of the rails today:


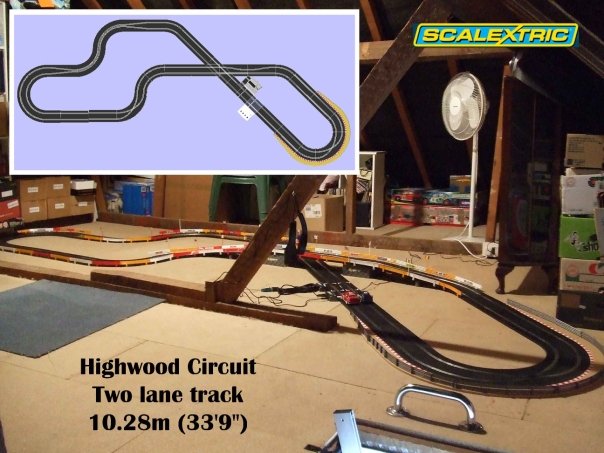
The track has been installed for eight and a half years in the attic room now but hasn't been used for a serious session for a year!  So need to find some time for some proper TLC and then get some more racing in...


Tuesday, 19 July 2016

Where it all started...

This photo just popped up on my Facebook memories - seven years ago today! - with the caption: "Have wanted to do this for about twenty-five years..."


It's come a long long way since then...


Sunday, 17 January 2016

Hairpin improvement

One of the pair of hairpins that form the climb up to the back of the track has always been problematic.  Firstly, the track rails seem to get pinched and so some of the cars would get stuck going round, and secondly, the side swipe would cause more accidents than in the Michelin hairpin because it was mostly hidden behind the pit building.

I've belatedly realised that Radius 1 turns are available that don't squeeze the lanes together.  I had to buy four 45 degree turns to make the whole 180 degree hairpin (see on the right of the photo below).


I've left the original tight hairpin at the top of the slope by the Michelin Man so we'll see over the coming weeks which is the most suitable.

Saturday, 19 September 2015

Counter-clockwise

Andy and I were messing around with the Nissan 350Z drift cars a couple of weeks ago.  The cars have 360 degree rotation in the guides so they can spin round and drive in the opposite direction.  We were enjoying the challenge of approaching familiar corners from an unfamiliar direction, when we had a light bulb moment - why not wire up the track so we can switch direction and race the other way?

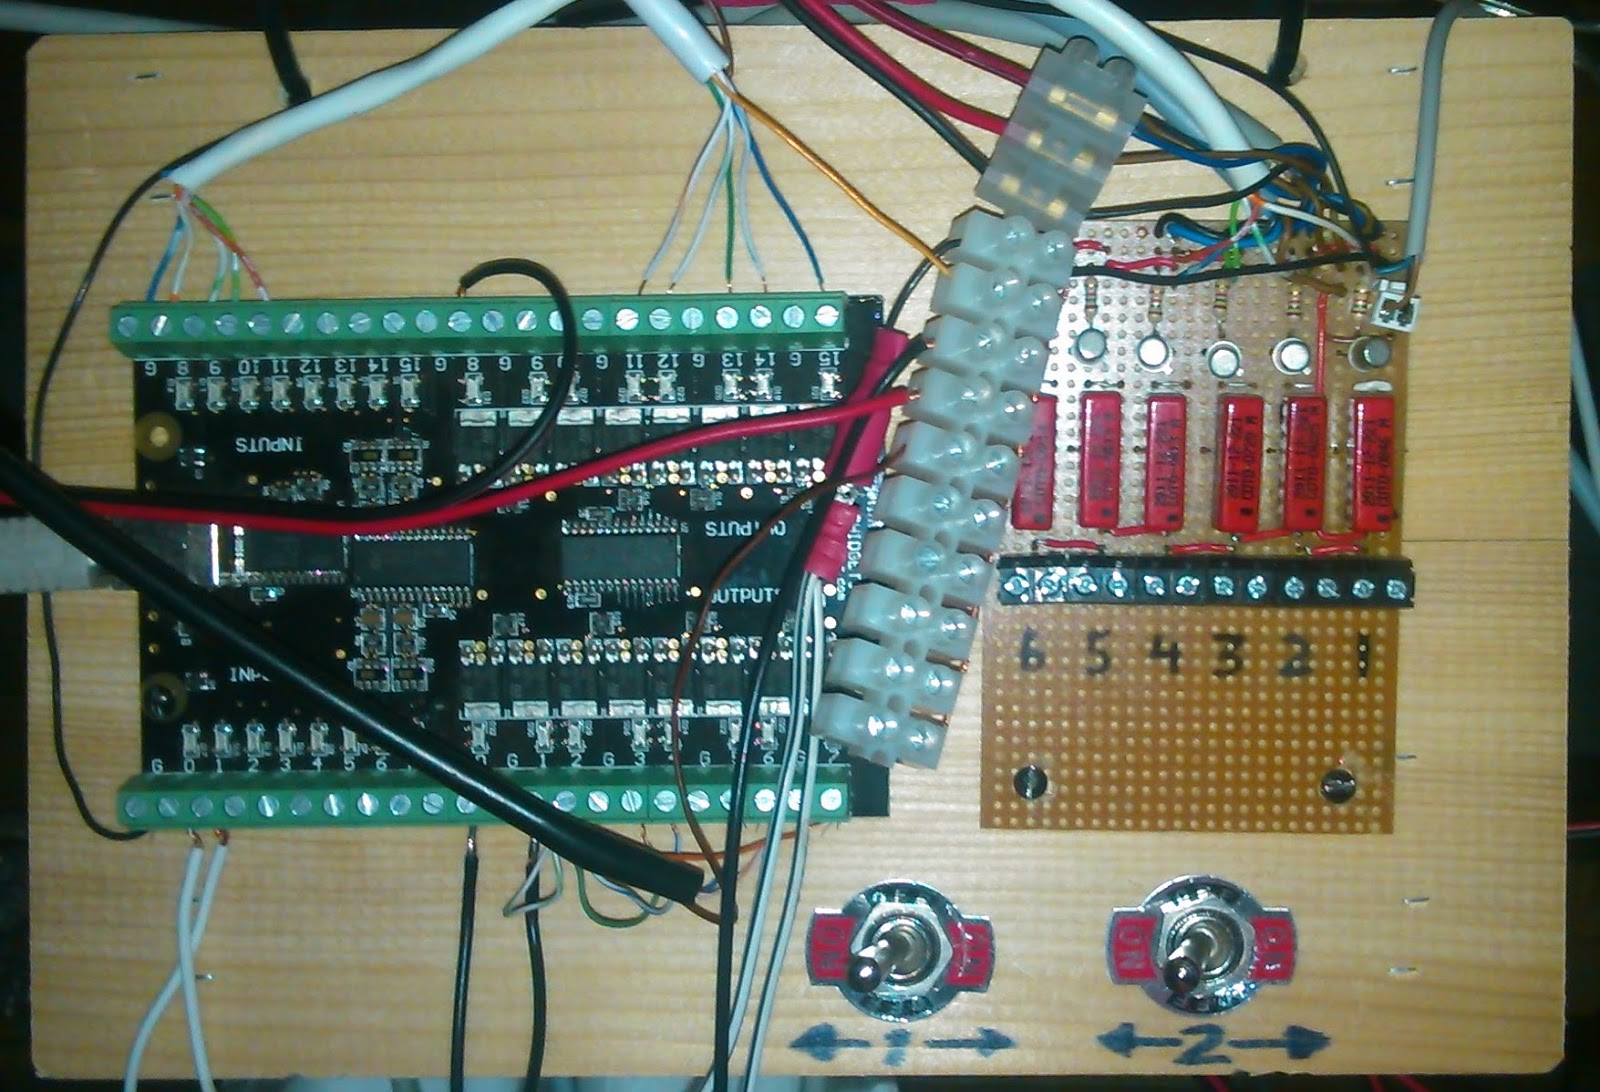
It's six years (to the week) since I started this project, and I don't know why that hadn't occurred to me earlier.  So I ordered a couple of heavy duty double pole switches and wired them so I could select the polarity of the power going to each track.  I fitted them to the wiring board under the table.


The various electrical projects have grown over time and this is now looking rather unkempt.  But then again, it's behind the curtain so can't usually be seen, so it's a low priority.  However, I have done some rewiring where a connection was a bit dodgy - I spliced the wires from the start lights into an Ethernet socket, and then wired a plug from the Phidget board, so that connection is now reliable.


I've set up a Highwood Reverse circuit in Ultimate Racer, my race management software, so we'll start creating a new set of lap times and data separate from the original clockwise circuit.  This will give a new lease of life to the layout.

Friday, 12 June 2015

Twins?

I checked my Facebook feed when I got home tonight and spotted a posting by Scalextric of a layout they were excited about.  I started watching the video and it was immediately familiar!


It was my design but not my track, and watching it was quite a strange feeling.  All was revealed in the comments where the owner of the track (another James) had credited Highwood Circuit as his inspiration.


James had found my track design on Google which had led him to this blog.  I'm really pleased to discover that Highwood has a twin on the other side of the country, and I hope to follow its development.

Saturday, 30 August 2014

Track improvements


I've never been completely happy with the bridge over the long straight.  It's narrow, drops in height too quickly, not fully supported along its length so not flat enough, and the clipped on barriers on the sides keep dropping off.


So thanks to Andy's big car, I got some more MDF and cut a long length to support the track over a steady six foot drop, that then continued losing height around the corner, so the track isn't table height again until the apex of the corner.


This looks and races much better, and allows more space to store cars underneath the elevated track.  I raised the corner piece of scenery and added some more fencing from Slot Track Scenics.


Another minor addition - a marker to indicate exactly where to stop to refuel, as the sensor in lane 2 can't be seen easily if there is already a car refuelling in lane 1.  The sign is made by Playmobil and I stuck a graphic of a fuel pump over the original image.


Sunday, 14 July 2013

Repositioning the start line

I moved the start line yesterday.  Simple to write, much more complicated to do.  I needed to take the drill and jigsaw to the table to cut the new hole under the track for the infra-red sensors, and then extend the wiring for the sensors and start lights.


Having the start line around the corner from the long straight has three advantages:
  • the risk of crashing on the corner at the end of the long straight is much reduced, as racers can't achieve the fastest lap or win the race by keeping on the gas all the way down the straight, now that they must slow down to successfully reach the sensor around the corner
  • the risk of missed laps is also reduced as the lap sensors and refuelling sensors are now further apart (previously laps would sometimes be missed with very fast cars as the signals from the sensors came too close together)
  • both racers can more easily see the start lights and the race status board
The chequered grid at the start line was originally a sticker.  It was starting to look a bit grubby and scuffed so I upgraded it.  I cut up the sticker into squares and stuck them in a chequered pattern.


I then sprayed the gaps with white paint and then applied a layer of matt varnish.


I also upgraded the pit lane:
  • replaced the home-made borders with genuine items (which hold the barriers much more firmly in place)
  • replaced the barriers in front of the pitlane with concrete "jersey wall"-type barriers
  • moved the refuelling sensors to a position half-way along the pit lane, and fitted the sensors right up to the rail to make it easier for narrow body cars to be detected

Lastly, with health and safety in mind ;-) I fitted some yellow and black anti-slip tape to the raised joist.


Given all the changes since the last one, I took a new panorama photo and a short video of the track.


Thursday, 23 May 2013

You can bank on it!

The exit of the second hair-pin was always a bit tricky for tail-happy cars, which would sometimes catch their rear ends on the barrier or slip off the edge of the track, and de-slot.


After a recent "box of spares" purchase, I realised I had a load more borders and barriers, so I added them along the whole left hand-side of the hill.


This gives a reliable exit to the hairpin and (once I've sprayed the borders black instead of sand) will look better too.

Andy had a banked corner section which I didn't realise you could still get, so thought I'd try it out.


I think banking that far corner makes sense but it was clear that if I used this piece of Scalextric track, I'd still have to build supports for the track leading up and out of it, as well as the surrounding borders.  Since this portion of track is all on MDF anyway, the simple solution was just to elevate one edge of the MDF to lift the entire layout in the corner, as you can see below.


That corner is the most difficult area to reach, requiring the grab handle device sometimes to avoid doing my back in when I'm stretching over the layout, so I hope the slight banking will make the corner easier to take at speed and so reduce de-slotting on that part of the track.


Thursday, 19 April 2012

Andy's 50th Birthday Track (Part 2 of 2)

I changed the flag on an old Scalextric flagpole to represent the 18th hole and found a little white round-headed pin to represent a golf ball.


The mini-roundabout:


Another shot of the pin and one of the bunkers:


And finally, a video of the track being tested.


Andy's 50th Birthday Track (Part 1 of 2)

After the success of my Top Gear test track, I thought I'd make something similar for Andy's birthday so that he could test and tune his cars before bringing them round for racing on the Highwood Circuit.

I wanted to build something a bit bigger than the Top Gear track with a longer route.  I started with the same 2 feet by 4 feet board but didn't shape this one other than rounding off the corners and adding a carry handle.

The concept was a main road with a mini-roundabout and a junction, but then the route would see the car doing doughnuts around the bunkers and green of a golf course - hence the name "The 18th Hole" and the choice of a VW Golf as the accompanying car.

The initial rough sketch (just about discernible):


After routing:


After initial painting:


After laying the copper tape:


And finally, after adding the dirt road and the tracks where the car has churned up the fairway:

Monday, 9 January 2012

Unique dust cover for slot car track


Slightly bizarre housing for a slot car track, not least because you'd be on your knees to play with it, but it does look pretty cool.  Full story here.

Saturday, 31 December 2011

Top Gear Test Track - Part Five: Detailing (Final)

The track is now finished.  Using the satellite imagery of the test track at Dunsfold Aerodrome in Surrey, I've now painted on the airfield markings and suggestions of the painted lines that indicate the test track route.  These three images show the steps from satellite, to plan, to final product.


The following three photos provide close-ups of the details:


And lastly, a video of the track in use, either embedded below or click here for YouTube.


Wednesday, 28 December 2011

Top Gear Test Track - Part Four: Shaping & Painting

I re-routed the track between Chicago and the Hammerhead, and filled over the mistake.


I then shaped the 4x2 board, rounding off the corners and adding a carry-handle, before painting the grassed areas.


The cars run much more smoothly around the extended curves.  Just some detailing and labelling to do now.

Saturday, 24 December 2011

Top Gear Test Track - Part Three: Electrics

I've now laid all the copper tape.  It goes down very easily and I used a small wallpaper roller to flatten the creases where the tape goes around corners.


I soldered in connectors to continue the power beyond the cross-over points, running the wire under the board in recessed channels.  You can see the soldered wires in this close-up of the main cross-over:


I took apart a Scalextric Sport power supply and wired some female bullet connectors to it, with the male connectors wired to the copper tape.


You can see the first test footage on YouTube or below if you're reading this in a browser.


It runs pretty well but it's not good enough.  The two corners in the middle and far end of the main runway are a little bit too tight to get the slot cars driving through smoothly.  So I think I may get the router out again and rework the part of the track indicated by the red dots below.


A Merry Christmas to all my readers!

Friday, 23 December 2011

Top Gear Test Track - Part Two: Routing

Phil, a colleague of Louise's, has kindly lent me his router over the Christmas holidays.  After some experiments on an old piece of chipboard this morning, I decided that the best way to route would be to create templates that the router could follow.


I cut the shapes from another piece of MDF and gently nailed them to the main board.  The first tight corner:


Over halfway...


Finished:


I had to fill the little holes left by the nails and then I painted the runways and side roads.


And with the masking tape removed, it looks like this:


 I hope to make a start with laying the copper tape either side of the slot tomorrow.  I remain worried that some of the corners may still be too tight for the slot cars, but then this is a test track in all senses of the phrase.