Thursday 31 December 2009

Testing, testing...

Louise bought me The Slot Car Handbook for Christmas which has lots of useful information about getting the best out of slot cars.  One recommendation was not to put new cars straight on the track but instead to run the motors in at various increasing voltages.  This is to prevent arcing at high voltages which vaporises bits of brush or commutator inside the motor.  I bought a variable voltage transformer and wired it up to a modified Scalextric Powerbase to act as a testbed.  A piece of MDF prevents the cars shooting off the front and pieces of foamcard underneath lift the driving wheels away from the track.


The other purpose of the testbed is to true the tyres.  Instead of the foamcard lifting the rear wheels clear, a piece of sandpaper is placed underneath and so any bulge in the tyres can be rubbed away.

On the testbed above are two Christmas presents from Andy - both in Martini colours.  In silver is the Porsche 917/10 Turbo Interserie 1974 and in black, a Marcos LM600.


I also got a car from Kieron for Christmas as well, a rather tasty Ford GT40 in silver and black - a Mark II from 1966.

I am, of course, now running these cars in...

Wednesday 30 December 2009

Tunnel

I'm getting through the chicken wire and plaster!  The tunnel is now completed and installed.  The entrance on the far side is just carved into the rock...

...and after plastering, painting and grassing looks like this...

The little holes on the right of the entrance have been drilled to accept a barrier.

On the (more visible) exit, I wanted a proper tunnel front with granite effect, so a few pieces of MDF and some railway modellers paper gives this:

With plaster, paint and grass...

And with the lights on in the tunnel...

In this photo, you can see how far the border strip goes.  Standing up, you won't see it.  But it highlights the latest development - home-made borders.  I've used 0.5mm plasticard cut to the shape of the track and affixed self-adhesive red stickers cut to right size.

A bit fiddly but much cheaper than buying Scalextric borders for the entire track.  It's the only solution for going under the tunnel but I've been using it along the straights as well.

Thursday 10 December 2009

Hill Construction

This is the elevated carousel turn going through four stages of construction.  First the MDF pieces were joined together using old video tape boxes and I stapled chicken wire to shape the hills.  Then using kitchen towel dipped in casting plaster, I built up the hills and rock faces.  Finally the rocks were sprayed grey, the grass areas painted green and then flocked with loose grass mix.


It's clearly not finished since there's a big hole in the middle.  This is to allow access to the power relay wires (visible at the back of the photo).  But I have a piece of MDF ready to fit the hole that will also need to be shaped with some feature (yet to be decided) in the middle.  I've got a few ideas but I've rejected the volcano as just too ridiculous!

Thursday 26 November 2009

Helipad

The standard of driving on the Highwood Circuit is such that emergency vehicles are likely to be required regularly.  Thanks to eBay, I found a 1/32 scale helicopter, helipad, ambulance and firetruck.  The helicopter and both vehicles all had buttons to set off sirens and flashing lights, so I thought the helipad should have some illumination too.  An evening spent untangling some Christmas lights, and clustering the multicoloured bulbs together (red for the helipad, orange for the planned tunnel, white for buildings) gave me what I needed.  I wanted the helipad raised because I thought it would look better and because it gave me the space for the wiring.  Here are the three stages of making the helipad surround with red emergency lighting...


The next stages were building up the terrain with foam ceiling tiles, smoothing the terrain by plastering pieces of kitchen roll, and then painting and covering it with modelling grass.


Finally, the finished piece back on the track with the helicopter and vehicles (with a small piece in the background I'd practiced on first)...


Sunday 1 November 2009

Bricklaying

Had a few days off over half-term, so have been cutting pieces of MDF to fit around the track (either to allow cars to slide out with de-slotting, or to provide a base for scenery) and have sprayed black all the border pieces (some of which were originally sand-coloured).

I also tried the first bit of scenery building - not with the now-delivered chicken wire and plaster - but with cereal packets and brick paper for train scenery.

Step 1: track supported by MDF and wood.

Step 2: walls built with cardboard and MDF.

Step 3: External and internal walls papered with brick.

Next steps: shape and grass around the base of the walls; place advertising on the inside of the hairpin

Saturday 24 October 2009

Ultimate Racer

I'm getting increasingly frustrated with the crappy Race Management System (RMS) I bought from Scalextric.  This morning I checked out one of the Scalextric forums and found a highly-rated RMS program called Ultimate Racer.  This provides a track editor (again much better than the free Scalextric one I've been using) as well as a fully featured RMS.  My 58'7" (or 17.85m) track looks like this in Ultimate Racer, with arrow indicating the direction of travel:


The software is highly configurable so I've been designing my own race screens - mainly so we can read the key information without having to squint at the screen!  You can also build up a list of drivers and a garage of cars, and it will store all the racing information for posterity.  And of course, you can choose your own sounds for events, so I'll be googling for Murray Walker audio files next...

It can work with a variety of sensors including the hardware that came with Scalextric RMS and has the option of controlling all sorts of other signals through other ports - for example, it can shut off the power if you haven't refueled in time, or will control gantry lights to indicate the start of a race.  These require a fair bit of wiring and a trip to Maplin, but I'd quite like to get a gantry working at some point.

All that, and it's free.

Monday 19 October 2009

Testing the track

Thought I'd plug in the Scalextric Race Management System software running on the laptop and see what the lap times were looking like.  Most cars coming in around 10 secs with the faster (and more magnetised!) models getting to 9 or below.  Much longer lap times than the original circuit despite only a having a few more pieces of track - just what I wanted as this reflects the increase in the number and challenge of the corners.

Although they are still quite small, the kittens have discovered how to climb the metal loft ladder.  Since they've also mastered finding their own way down again, we've stopped trying to prevent them.  So I had a spectator for my track testing this evening...

Sunday 18 October 2009

Elevating the track

Plenty of cutting today, with mask and goggles to keep the nasty MDF dust at bay.  The track now has MDF supporting all the elevated places, rather than just balancing the track directly onto supports, and I've fitted all the barriers - going with silver on the corners, alternate red and white on the elevated sections, and ditched the original Scalextric ones in the strange orange colour.

I wanted the far back corner higher than the 180 turn in front of it, so that they could eventually be landscaped together into the same hill.  This made the approach from the left rather steep, so I elevated the start of the incline and raised the hairpins to match it.  Which actually means the use of the hairpins makes more sense i.e. to climb a hill in a confined space.


I also cut MDF sections around the hairpins to allow the cars to slide their tails right out without coming un-slotted.  Above is Starsky giving it some gas on the second corner.  Below is a video of the Audi Quattro testing the hairpin sections - much more tail happy now I've removed the magnet completely.  (If you're reading this in an e-mail, the embedded YouTube code might not work, so click the link at the bottom of the e-mail and it will work in your browser).


Finally I drilled some holes in the table struts to tidy away the wires.


Thursday 15 October 2009

Lady Racers have a pink box

Andy's original plan for my birthday present this year has fallen through so he very kindly provided some some vehicles for my garage.  The first of these is an old favourite - the 1980s Audi quattro.  A devastatingly successful rally car that introduced four wheel drive to motorsport and road cars.


It's a fantastic model, highly detailed - the navigator is even holding a ring binder with pace notes written on it - and has genuine 4WD.  But it comes in a garish pink box with Lady Racers written all over it!  This is the somewhat dubious packaging of Fly's range of cars successfully competed by women drivers (Fly are a Spanish company and probably the top slot car manufacturer).

This car was driven by Frenchwoman Michèle Mouton who is the most successful and well-known female rally driver of all time.  She was the first (and so far the only) woman to win a round of the World Rally Championship, the Rallye Sanremo in 1981.  Below is her rally-winning car and you can see how accurately Fly have copied it (although it's in sparkling podium appearance in the model).

The model drives well and makes more noise due to the cogs driving both axles.  I think the magnet might be a little strong so I might see about swapping or raising that, to help get the back end out properly.

Saturday 10 October 2009

The hills are alive

I've been thinking about how the elevated lengths of track could be supported and built into hills.
The slopes up and down into the elevated part of the track will be like flyovers with bridge supports.  The carousel turn (foreground of picture) will be on a hill with its centre continuing to rise.  The fast turn (background of picture) will be built up into a hillside, and the two sections will be connected by a tunnel piece.  In cheesy Paint-o-vision, it looks a little like this...


Sunday 4 October 2009

A good weekend's work

Two working days of effort this weekend have resulted in my Scalextric tables being made and installed in the loft.


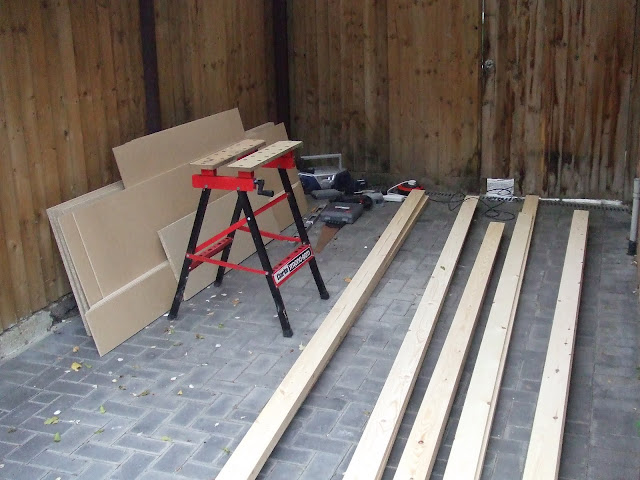
Mid-morning delivery of 4'x8' chipboard, 4'x8' MDF, and metres and metres of 20x95mm softwood, plus some 45x95mm for the legs.
 

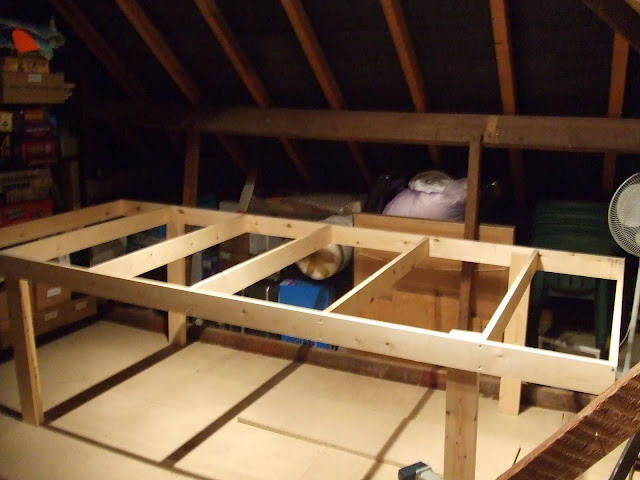
One of the tabletop frames.


Unsurprisingly, the loft floor wasn't completely flat, so the most challenging job was trying to balance the frame, keep an eye on the spirit level, and fix each of the four legs.
 

First table finished with chipboard attached.
 

Second frame under construction.
 

Both tables finished.
 

MDF fitted around the outside of the tables to catch cars that leave the track.


The track layout, piece by piece...
 

The finished track, with spotlights installed and new pictures on the wall (subject of a future blog, I think).  I had the first test session with Herman, one of Louise's Maltese cousins.  We tried rally cars, with and without caravans in tow, then Formula 1 cars and lastly (since Herman is a biker) the Valentino Rossi motorbike.  The track ran very well and the variety in the corners was really good. 

The track is elevated with video boxes at the moment.  I want to have several test sessions before starting to build hills or anything semi-permanent.  You know where to come...

Saturday 3 October 2009

Just a teaser...

Been working all day on the tables, and I've got 15 mins to shower and change before we go out, so here's a quick before...


...and after...

Full story to come later.

Friday 2 October 2009

End of the original track

After another blitz on clearing the loft last night and with the wood arriving tomorrow, all the Scalextric track is piled up in stacks in the corner.  Here's the video of that first, now dismantled, track.


Thursday 1 October 2009

New Le Mans car

Although Andy has an extensive collection of Scalextric cars, I want to make sure that I always have a pair of equally matched cars to race against other people - for example, I currently have a pair of rally cars, F1 cars, and American muscle cars.

The Aston Martin freebie from the Scalextric Club was my first contemporary Le Mans car and therefore I needed a counterpart.  So tthis weekend I bought a Maserati MC12 Le Mans car.


The Maserati MC12 is a two-seater long-tail coupé-spider.  The original has a 6 litre engine producing 630hp.  This smaller, second-hand version is slightly less powerful but features sub-frame engine mounting design for better road holding, a highly detailed interior design and etched metal parts. It has working lights, adjustable Magnatraction positions and easy change pick-ups.  It is also missing a wing mirror ;-)

After several disappointing conversations with the national DIY stores, I finally ordered today the wood and boards I need to construct my Scalextric tables from a local family-owned builders merchant.  It should all be delivered on Saturday morning so I know what I'll be doing this weekend...

Friday 18 September 2009

Track Design

The original temporary layouts on the floor of the loft were constrained by the two joists that sat proud of the loft boarding. The final layout was pretty long but being at ground level meant that it got covered in chipboard dust when we stepped over it, and there was just too much bending involved to put the cars back on the track. Just as importantly, the track design (below) wasn't interesting enough as there was too much similarity in the shape of the corners.


My key design principles were:
- track at waist height
- two lane track that doesn't require marshals i.e. all track must be within an arm's reach so the racers can re-slot their own cars
- variety of types of corners
- preferably some variation in height
- room for a pit lane

I found a site with some great advice on track design and different types of corners e.g. carousels, hairpins, 180 degree turns, and sweeping turns. So I wanted as interesting a track as possible, whilst fitting on two 4 feet wide tables positioned in an L-shape.

This is the design I want to build...


As you can see, the track needs elevation to let the long straight (which will be the start-finish straight) run under three parts of the track. The alternative would be elevating the long straight but a sloping start-finish start feels wrong. The other alternative would be to avoid any elevated track altogether. Andy (builder of the much-missed Minchinhampton GP track) has cautioned me about the challenge of effective track joints on slopes, so I have also designed the following track which will fit on exactly the same pair of tables - so if my preferred design is a disaster, I have a fallback option.


Thursday 17 September 2009

Gentlemen, Start Your Engines

I've been thinking about my Scalextric project for a couple of months and some friends have been asking how it's going.  So I thought I'd create a blog, partly for me, partly for them, possibly even for other Scalextric enthusiasts.  I expect to post quite often at the beginning because there's two months of planning and purchasing to catch up with, but no doubt it'll slow down over time.

This project shouldn't feel like work, it's all about fun, so I'm not going to put a time or price limit on it. I'm expecting the research, design and construction to be as much fun as the actual playing with the finished setup.

This first post is also marked by the delivery today of my Scalextric Club pack.  £24 a year to join which gets you a quarterly magazine, exclusive offers and competitions, and the clincher - a free limited edition car each year.  This year's car is the 2008, Le Mans winning, Aston Martin DBR9 in Gulf livery with a special weathered finish (i.e. dirty).  It looks awesome.